Reloading Studio
Built by reloaders for reloaders.
A modern reloading software for managing, tracking, planning and cataloguing your entire reloading workflow, components and firearms.
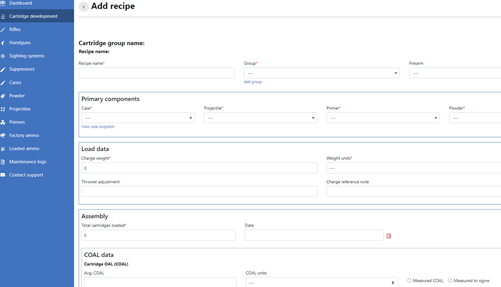
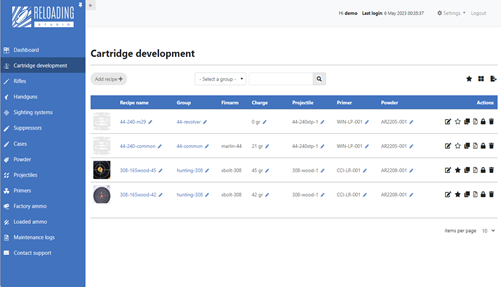
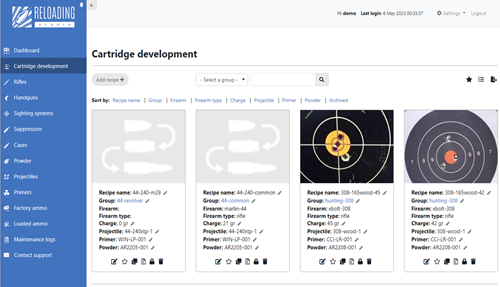
See, manage and organize your reloading data on one screen.
No more frustrating spreadsheets or sifting through notebooks! Reloading Studio is the reloading software you’ve been waiting for. It enables you to manage, document, track and plan your entire reloading process. And yes! You can even print reports to store in the workshop binder.

We got you covered.
Workflow

From brass prep to performance and notes on the environment – Reloading Studio enables you to track and manage your entire reloading workflow.
Components

Manage, generate reports, track your reloading components and prep workflow – in as much or as little detail as you desire.
Firearms

Track, create relationships and record technical specifications for all firearms in one place! Even include photos and files as attachments.
Gallery

Pricing
$5 / month
Price is in Australian Dollar (AUD). No lock-ins, your data is never shared and it’s yours. All data can always be exported in convenient formats.
Cheaper than half a pistol primer or about as much as buying me a cup of coffee a month.
Just a taste!
- Manage and track your entire load development process.
- Automatically track barrel life and component quantities.
- Organize load development into batches and groups.
- Generate labels, summary and detailed reports.
- Document performance, sighting notes, weather and ballistics.
- Catalogue reloading components, cartridges, firearms and more.
- Track brass history, prep process and notes.
- Create recipe, firearms, optics relationships.
- Attach photos and documents to reference targets, firearms and component attributes.
- Check out the Blog and Help pages for more info…